
Providing secure access to cloud infrastructure is one of the biggest challenges facing IT professionals today. AWS Client VPN offers a robust solution to this challenge, providing a managed client VPN service that enables secure access to AWS resources and on-premises networks. In this guide, I’ll explain everything you need to know to get started with AWS Client VPN.
What is AWS Client VPN?

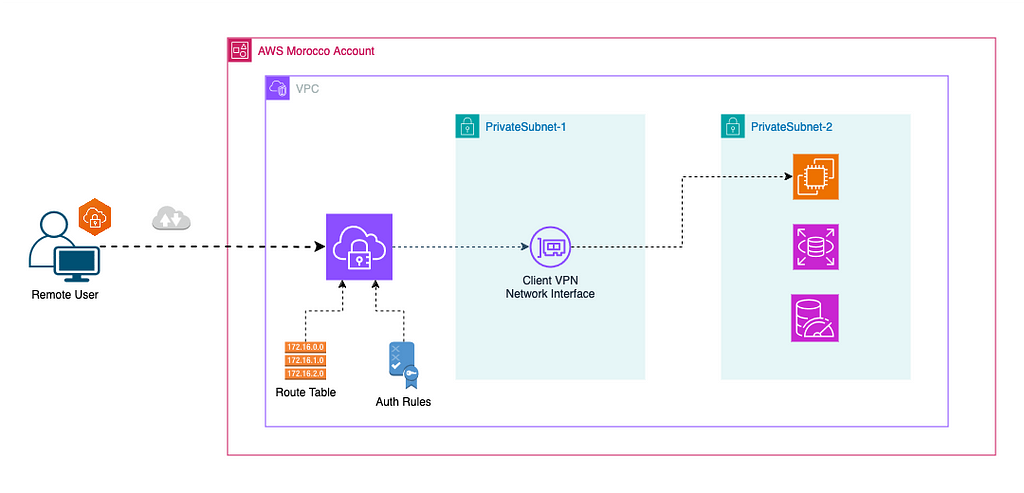
Think of AWS Client VPN as your secure tunnel into AWS. It’s a managed VPN service that lets your team safely access AWS resources from anywhere in the world. Unlike traditional VPN solutions that require extensive setup and maintenance, AWS Client VPN handles most of the heavy lifting for you.
Why Should You Care?
- Security : Implements enterprise-grade security with certificate-based authentication
- Flexibility : Connects to both AWS and on-premises resources
- Scalability : Automatically scales based on your needs
- Managed Service : AWS handles the infrastructure, you focus on configuration
Setting Up a Client VPN Connection
1 — Certificate Setup
Before diving into the AWS console, you’ll need to set up certificates for authentication. Here’s a streamlined approach:
1.1 — Clone EasyRSA repository
1.2 — Initialize PKI Structure
| |
1.3 — Create Certificate Authority
Generate the root Certificate Authority that will be used to sing all subsequent certificates later. The nopass flag removed the password protection.
| |
1.4 —Generate Server Certificate
Creates server certificate and private key that is automatically signed by the CA created in the previous step.server is the certificate identifier.
| |
1.5 — Generate Client Certificate
Creates client certificate and private key that is also automatically signed by the CA. It will be used for client authentication.vpn.zakaria.elbazi is the certificate identifier (you can set anything you want but it’s recommended to keep it simple and meaningful).
| |
1.6 — Import the certificates to ACM (AWS Certificate Manager)
- Import the created Server certificates to ACM
- Import the created Client certificates to ACM
Once Imported, you can access the certificates in ACM:
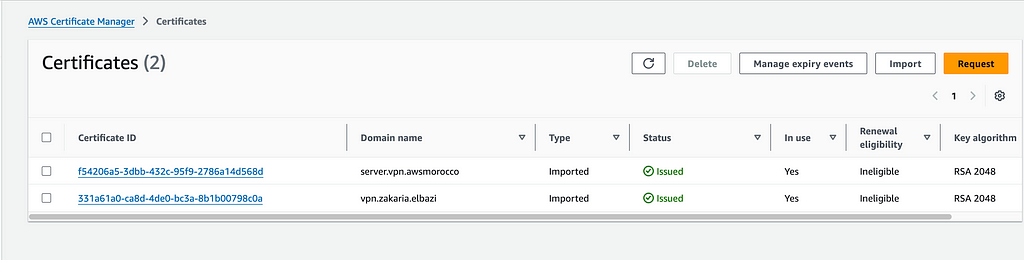 ACM
ACM
2 — Creating Your VPN Endpoint:
The VPN endpoint is where your clients will connect.
To begin, navigate to VPC > Client VPN Endpoints > Create Client VPN endpoint in your AWS Console. During the creation process, you’ll need to set the VPN endpoint Name and Description (both are optional). You’ll also need to specify the Client VPN CIDR range — for example, you might use 10.0.0.0/22 for standard deployments or 172.20.0.0/16 for larger networks.
Make sure this CIDR doesn’t overlap with your existing VPC or on-premises network ranges.
Under Authentication information, select the Server certificate you previously imported to ACM. Choose mutual authentication for the authentication options, and select the client certificate you previously imported to ACM as well.
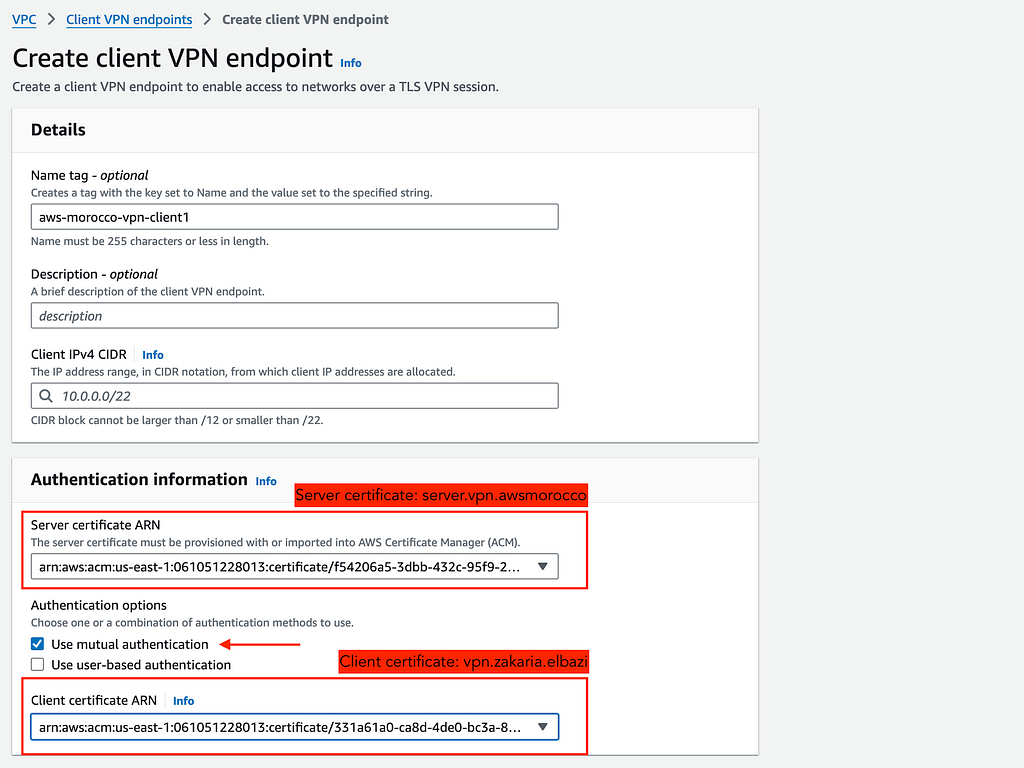 Client VPN Endpoint
In the Additional Parameters section, specify your DNS server preferences and decide whether to enable split-tunnel. Split-tunnel configuration determines if only traffic destined for resources in the VPN should go through the VPN connection. You’ll also need to specify the VPC and Security group you want to attach to the VPN Endpoint — if you don’t specify a security group, the default Security Group will be applied.
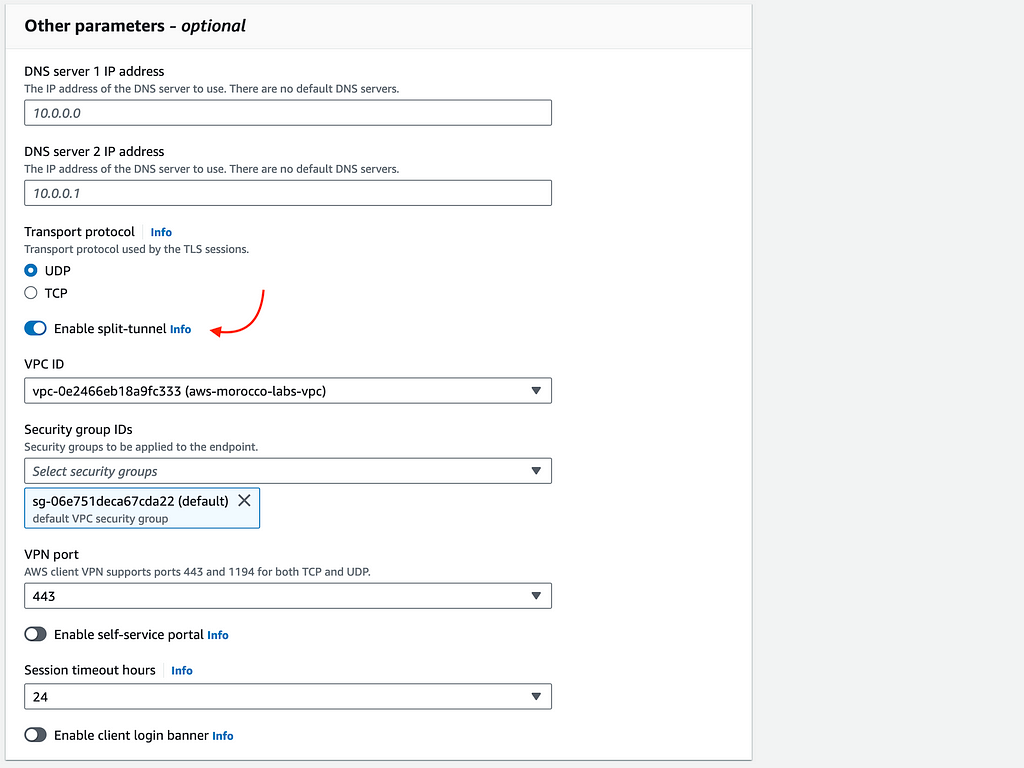
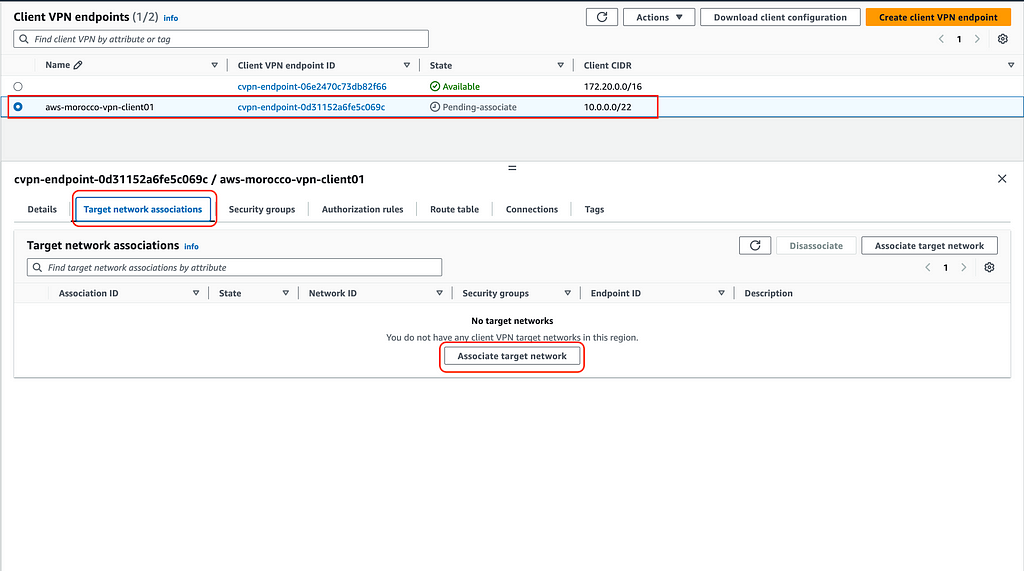
It’s important to note that once created, the endpoint will remain in the pending-associate state until a target network association is added. This means you’ll need to associate the endpoint with at least one subnet in your VPC before it becomes operational.

3 — Configuring Target Networks:
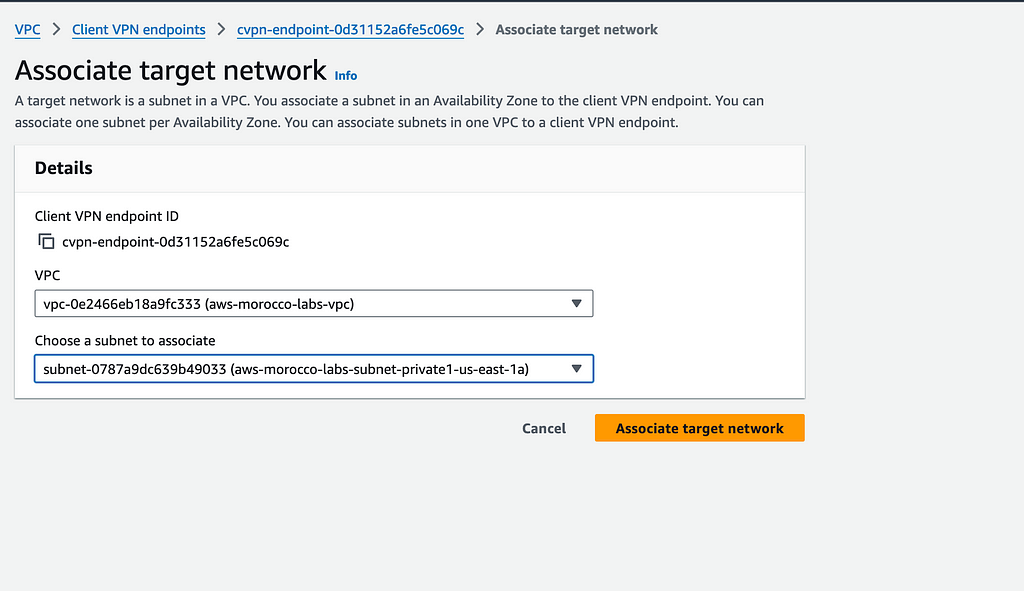
After your VPN endpoint is created, you’ll need to associate it with a target network. Select your endpoint, and click ‘Associate target network’ where you’ll select your VPC and subnet.
 Target Network
Configurations
Target Network
Configurations
You can associate multiple subnets from the same VPC for redundancy, but they must be in different Availability Zones. The association process usually takes 5–10 minutes to complete, during which the status will show as ‘Pending’ before changing to ‘Available’.
 Associate VPC and a
Subnet
Associate VPC and a
Subnet
4 — Configuring Authorization Rules:
Authorization rules define what resources your VPN users can access. Find these under the ‘Authorization Rules’ tab in your Client VPN endpoint settings.
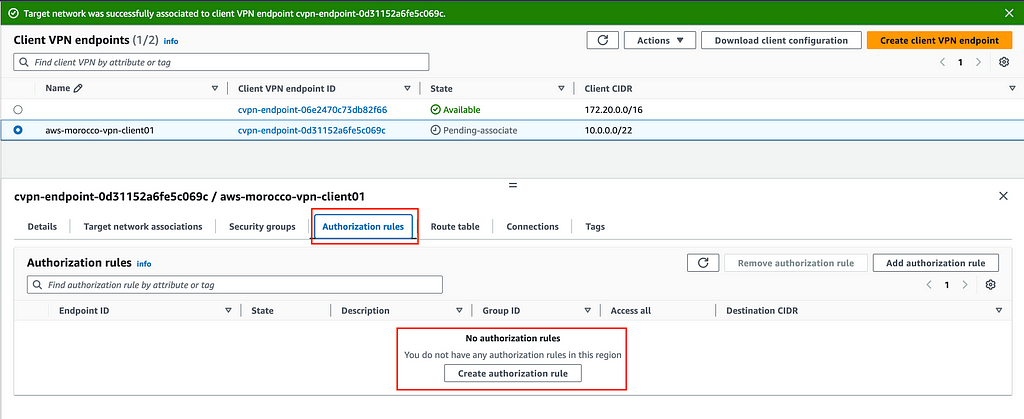
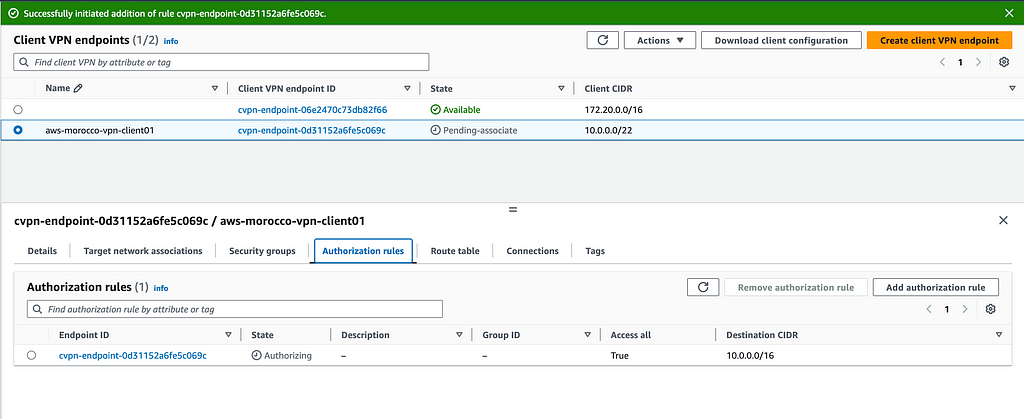
Since no access is granted by default, you’ll need to add rules by clicking ‘Add authorization rule’. Specify the destination network CIDR (typically your VPC CIDR or specific subnet) and choose whether to authorize all users or specific groups if using Active Directory.
5— Configuring Route Tables:
The route table configuration determines where your VPN traffic should be directed. In your Client VPN endpoint’s ‘Route Table’ tab, you’ll notice a default route is automatically added for the associated subnet’s CIDR range.
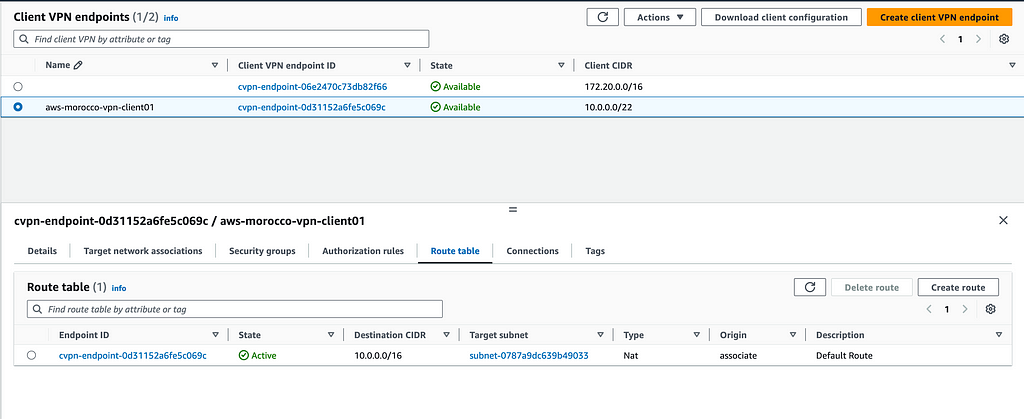
For access to additional networks like other VPC subnets or on-premises networks, you’ll need to add routes manually. Simply click ‘Add route’, specify the destination network CIDR, and select the target subnet for routing the traffic.
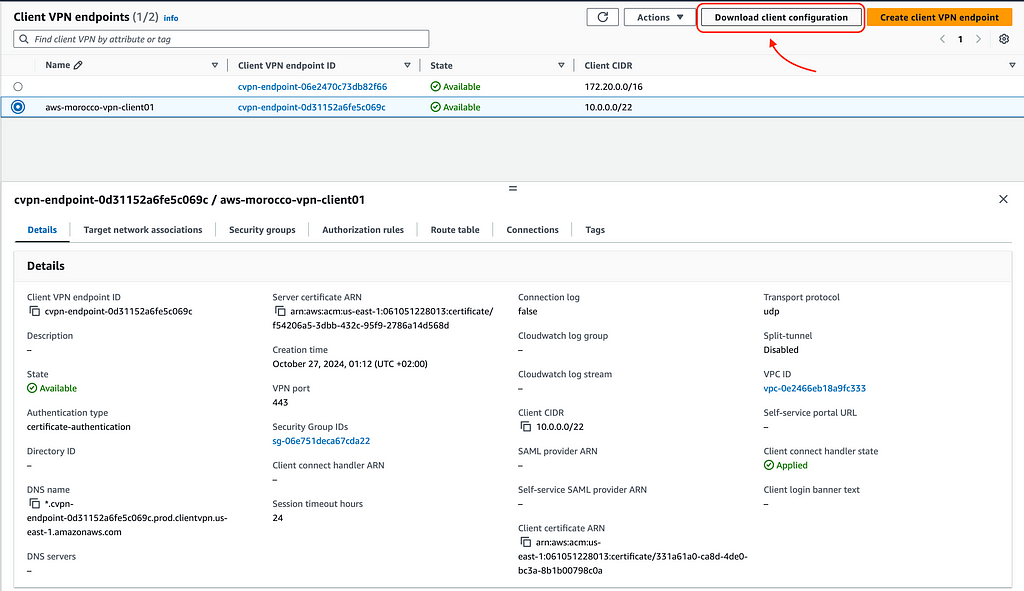
6 — Download Client Configuration:
When all settings are in place, you can download the client configuration file. Select your endpoint in the dashboard and click ‘Download client configuration’.
Before using this configuration, you’ll need to modify the downloaded .ovpn file to include the client certificate and private key.
Open the .ovpn file in a text editor and add the following blocks at the end, replacing the placeholders with the actual certificate and key content.
Once that’s done, Download and install the AWS VPN Client .
AWS Client VPN Download | Amazon Web Services
After installation, they can add a new profile in the AWS VPN Client, selecting ‘Import from file’, and choosing the modified .ovpn file.
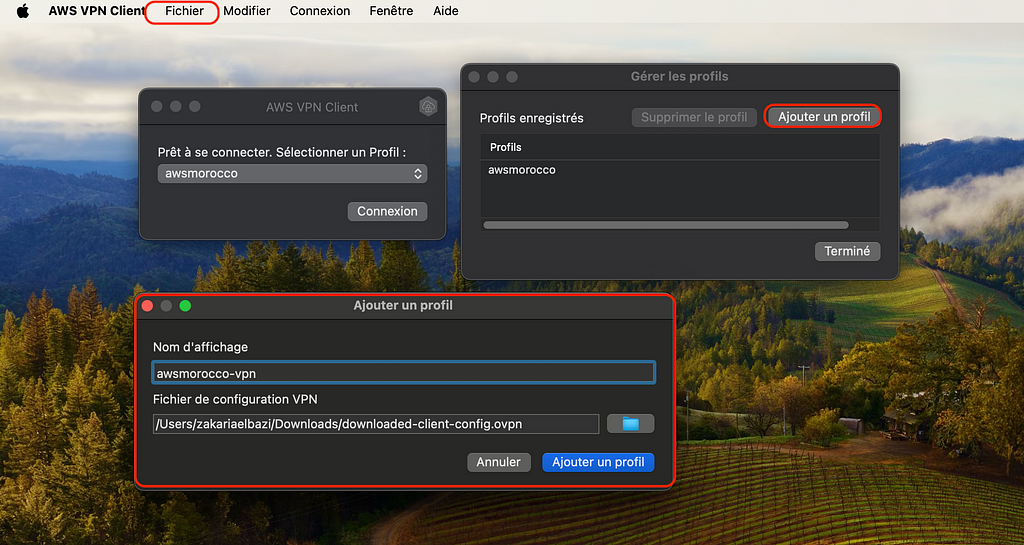 Setup a new VPN Profile
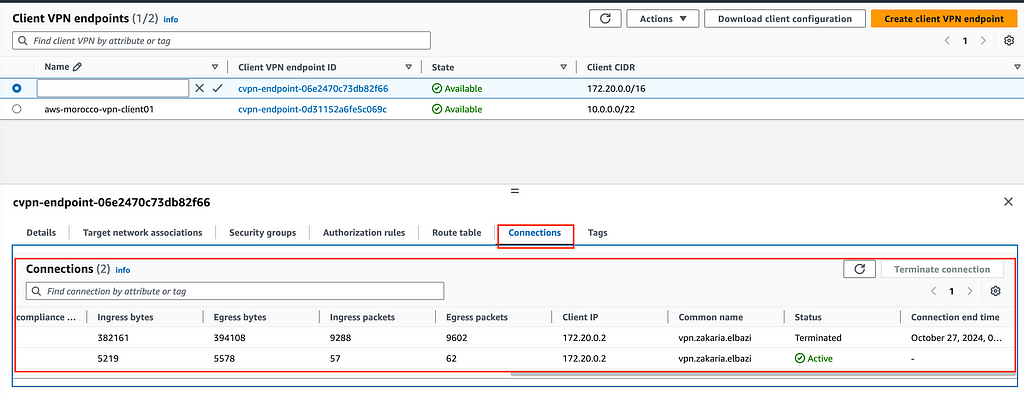
The profile will be ready to use immediately — you can connect by selecting the profile and click ‘Connect’.
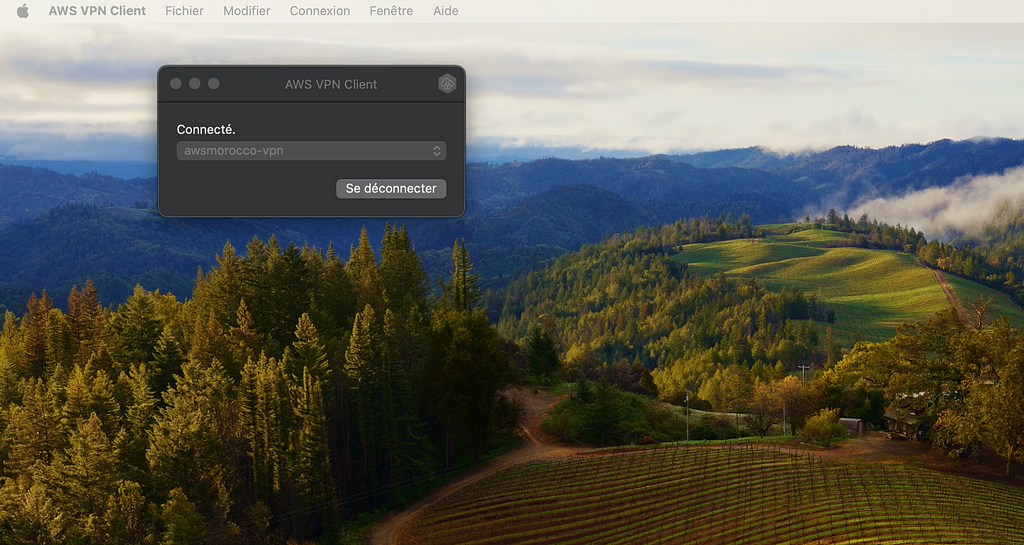
Once connected, you should be able to see it under the connections tab.
7 — Testing the VPN Connection :
The best way to verify your VPN connection is by accessing resources that are only available within your VPC.
For example, you can test by connecting to a private EC2 instance
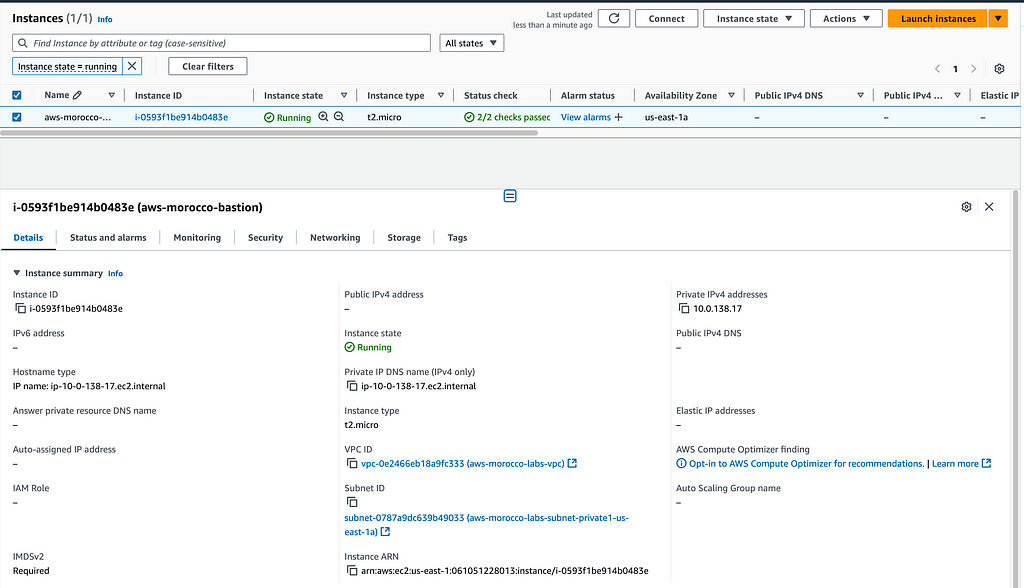 Private EC2 instance
A successful connection confirms that your VPN is properly configured and routing traffic to your VPC’s private resources.
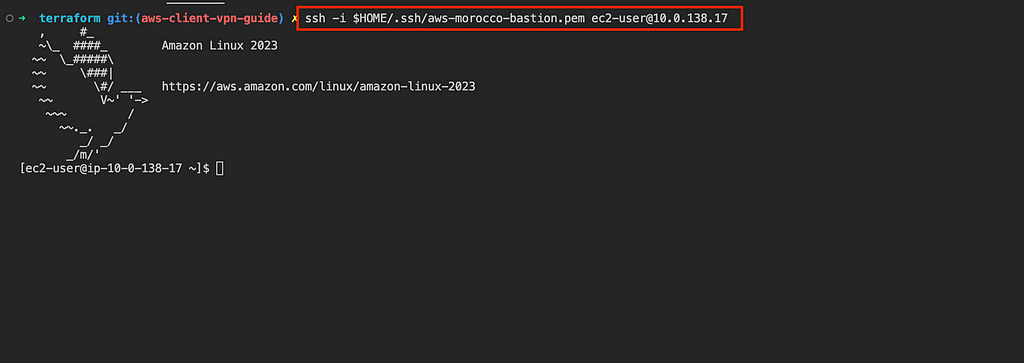 Successful SSH
connection (over the VPN connection)
Successful SSH
connection (over the VPN connection)
8 —Automating with Terraform :
Here’s how to set up your AWS Client VPN using Infrastructure as Code:
| |
This Terraform configuration creates a complete AWS Client VPN setup including the endpoint, subnet association, route, and authorization rules. Remember to adjust the CIDR ranges and subnet IDs according to your environment.
8 — Security Best Practices:
Security Best Practices
1. Implement Least Privilege Access — Only grant necessary permissions — Use security groups effectively — Regularly audit access patterns
2. Certificate Management — Rotate certificates regularly — Implement proper revocation procedures — Maintain a certificate inventory
3. Monitoring and Logging — Enable CloudWatch metrics — Review VPN access logs — Set up alerts for unusual activity
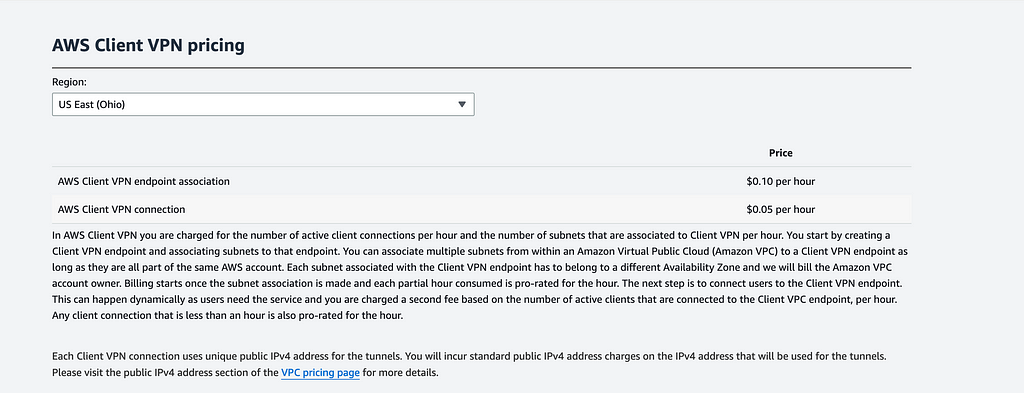
9 —Cost Considerations:
Before implementing AWS Client VPN, consider these costs: - Hourly charges for each VPN endpoint - Data transfer fees - Association costs per subnet
Final Thoughts
AWS Client VPN offers an excellent balance between security and usability. While the initial setup might seem complex, the long-term benefits of a managed, secure VPN solution far outweigh the setup effort.
ℹ️ Architecture diagram in raw format and terraform code are available here:
aws-morocco-samples/aws-client-vpn-guide at main · Z4ck404/aws-morocco-samples
Audio discussion generated by Notebook LLM :
AWS Client VPN: A Practical Guide to Secure InfrastructureAccess was originally published in AWS Morocco on Medium, where people are continuing the conversation by highlighting and responding to this story.